

How To Use The Xyron Create A Sticker
Xyron Sticker Maker Machine
Hey to all my favorite crafters! It'due south Rebecca E Parsons back today with a fun tutorial – today we volition create a Sticker, or several actually, with the Xyron Sticker Maker Machine! I was chatting with Karen recently and she asked me if I had a Xyron Sticker Machine. Of course I accept 1 in my perpetually growing stash of art supplies. Withal, I told her I had not used information technology in a long time. Then I dug it out, cranked information technology up, and made my own stickers. Easy peasy it is! No messy gum ways clean-up is a breeze. Why don't I use it more often? Hmmmm… It is great for my junk journals, books, and just almost every art and arts and crafts we make. If you've been wondering "How does a Xyron Sticker Make Work?" then this post is for you!
Supplies to Create a Sticker
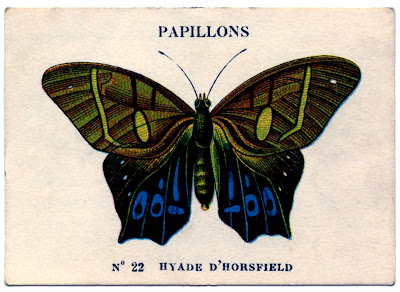
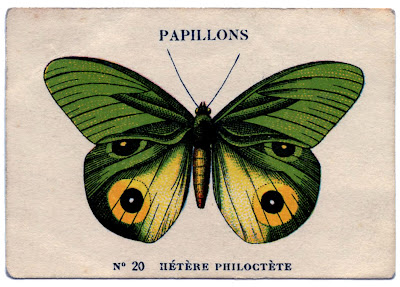
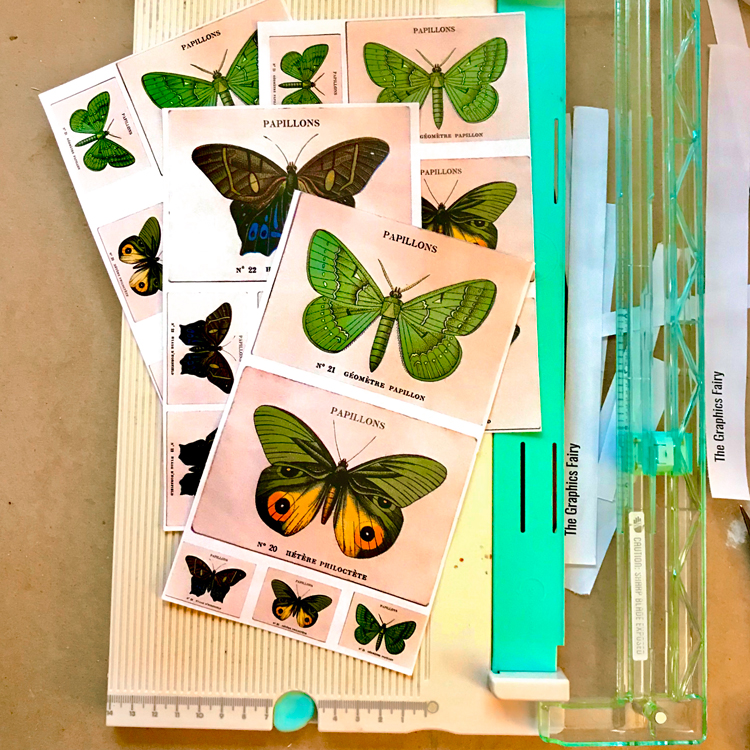
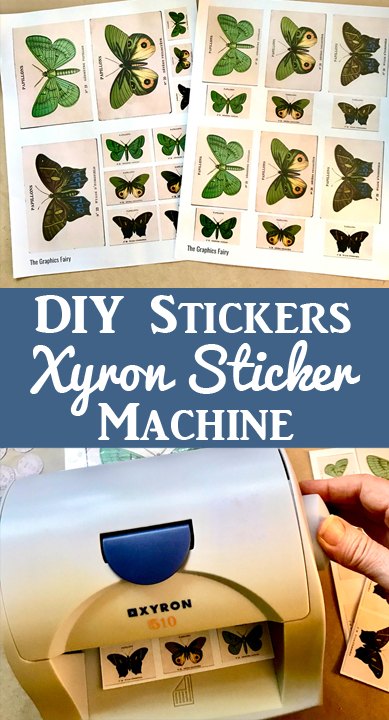
I used three cute Papillon Images for this sticker making tutorial. Here they are:

I designed a little Printable PDF for you. Download Papillons Printable HERE!
All you need is a Xyron Sticker Maker Machine and the correct cartridge for what you want to brand and some inspiration! With my old auto, Xyron 510, y'all tin laminate (single and double sided), make repositionable and permanent stickers, and create magnetic stickers (although it looks like this cartridge is no longer available). The machines come in several sizes – two cute 1-1/2″ machines here and here, a 2-one/2″, a 3″, and the mac daddy 5″ (like mine). There are even disposable models. The cartridges have 20 feet of material, which is a lot!!
Papillon Images
Xyron five″ Sticker Maker – or any size machine you lot have
Xyron Cartridge (The machine should come with ane)
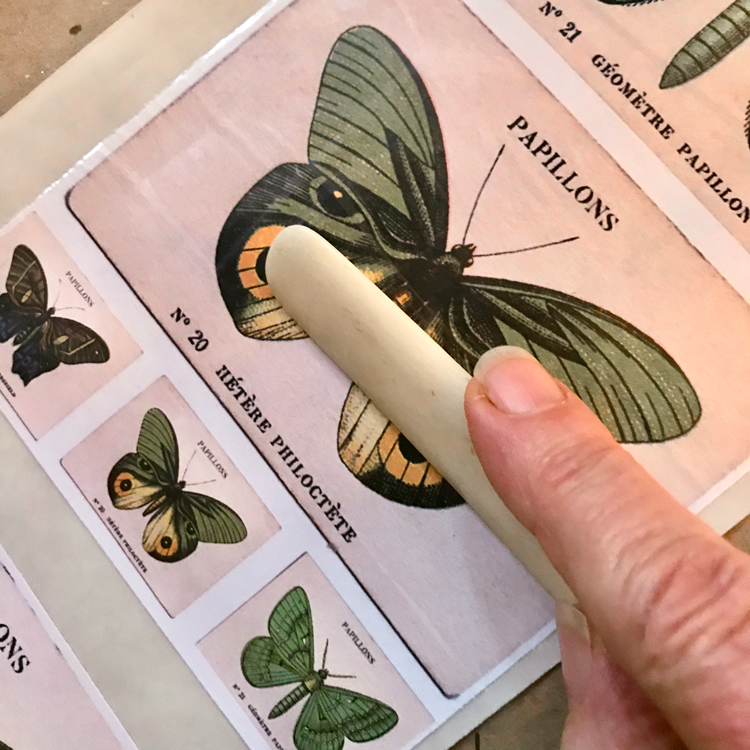
Bone Folder
Corner Rounder Punch
Fancy Edge Scissors
How to Make Stickers With the Xyron Sticker Maker Machine
About the Xyron Sticker Machines
These are so useful for chop-chop and efficiently creating stickers. The beauty is that 'almost' any apartment textile, fifty-fifty buttons, can go a sticker, as the adhesive gives a strong concur. All of the cartridges are Acid Free. They are great for junk journals, scrapbooking, art, or arts and crafts projects. You don't need electricity, batteries, or estrus. Yous tin even permit the children use it! My grandchildren love to laminate things!! The machines are a good size to fit on your work table, so they are close by for your sticker making projects!
Step one. Print and Prep Images
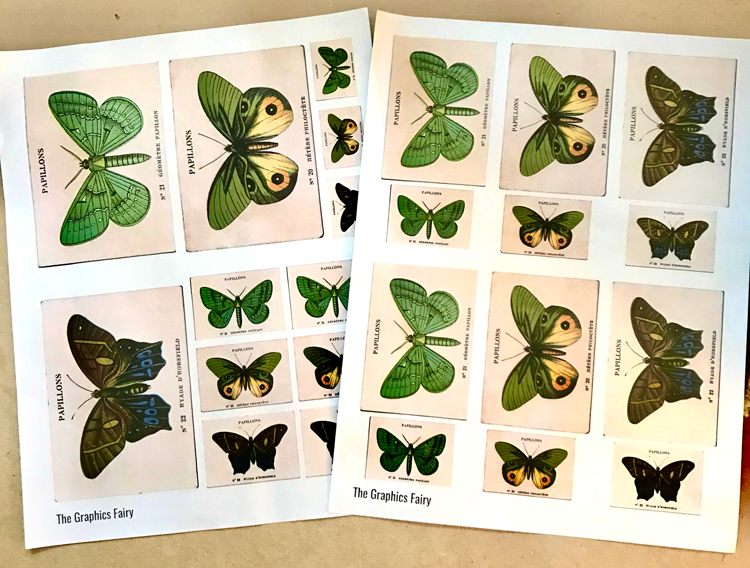
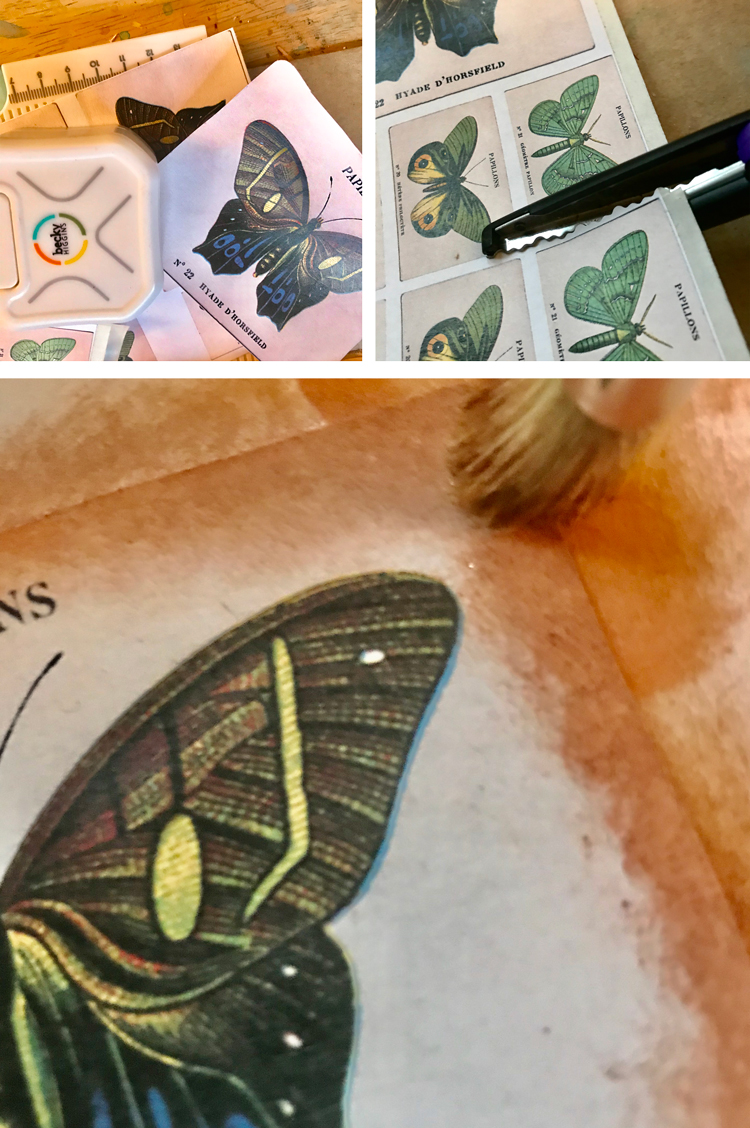
Yous can utilise the beautiful Papillon images or anything from The Graphics Fairy archives. You tin can print them with an inkjet or a laser. YAY! Any weight of paper and cardstock can exist used in the Xyron. I designed a 2-page printable of the images for you lot. The butterflies are placed perfectly on a page for use with the 5″ Sticker Machine. They tin can easily work for the other sized sticker machines as well. Simply trim them to fit your model. These are all just under v″ wide for mine.
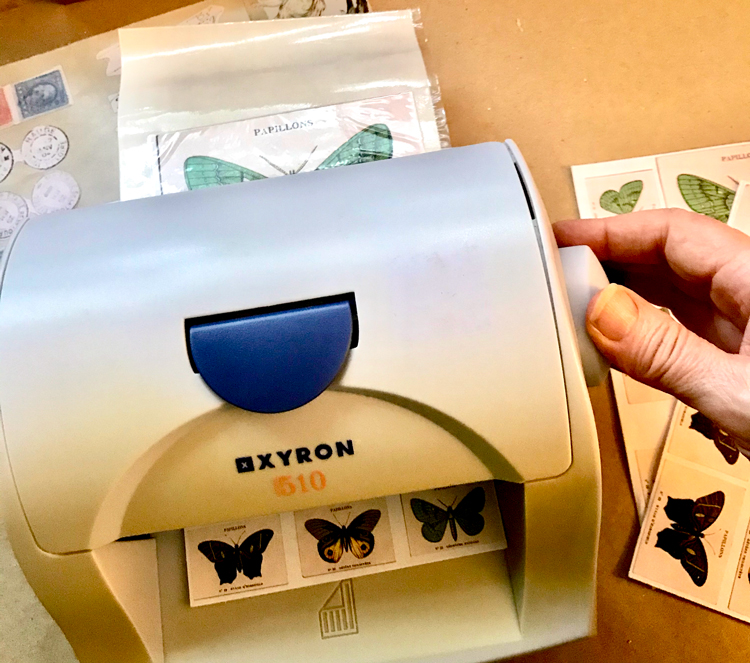
Step 2. Pop in a Cartridge
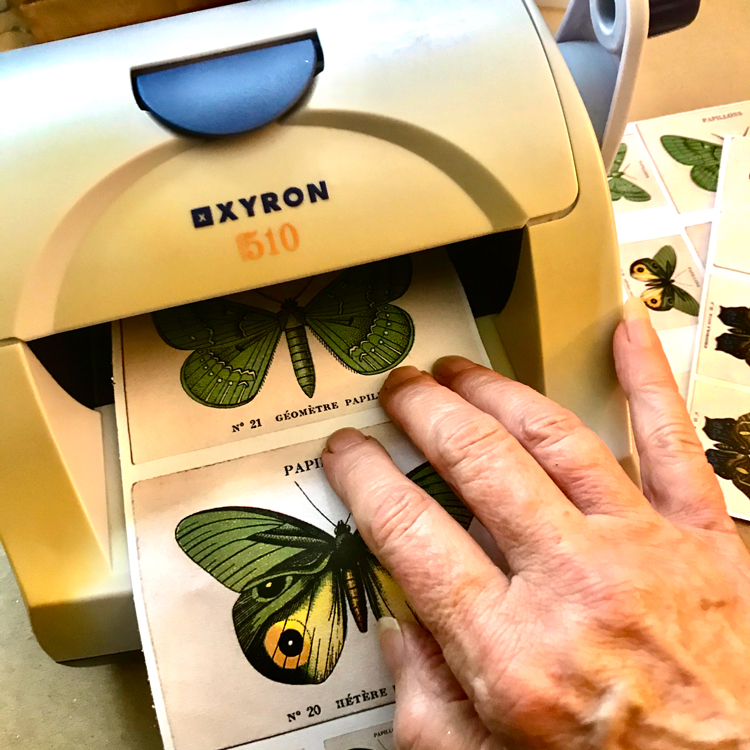
I used the repositionable adhesive cartridge for my stickers. The cartridges drop easily into place. If you have to push or tug, it is off kilter so try again. Just pull up on the little lever on the meridian of the machine to open. Come across the blue semi-circle lever in the beginning epitome in step iii below. Again, you practice not demand to tug difficult to do this. You might exist wondering if the Xyron Stickers are Waterproof and I'yard afraid they are not, and then exercise proceed that in mind.
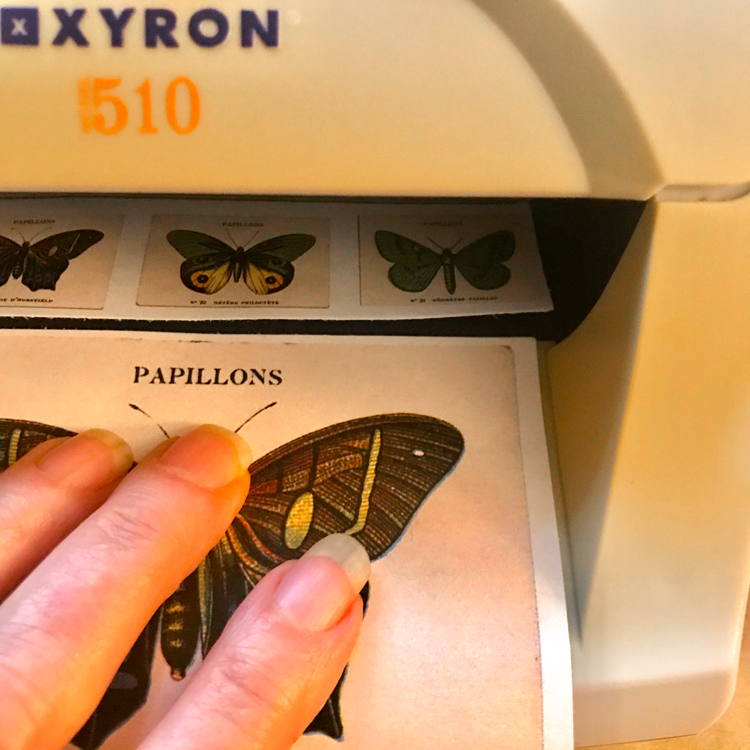
Step 3. Create a Sticker
Place the images in the front side of the auto. Push them gently equally far equally they will get. Don't strength them.
Turn the handle clockwise. The epitome will coil through easily. The finished sticker comes out of the back of the machine.
Tear the prototype off; if you have an older machine similar mine, it has a bract runner to cut the sticker sheet. Like shooting fish in a barrel! Burnish them with a bone binder or spoon.
Pace 4. Tips and Tricks
Although you can definitely fussy cut the butterflies, I found the antennae were a slight problem. The automobile took them easily, simply my heavy handedness fabricated them separate when I was trying to attach them. Of course, I encourage you to try if you lot so desire. When cutting them, I prefer to leave the Papillon Paradigm whole with the background as seen below.
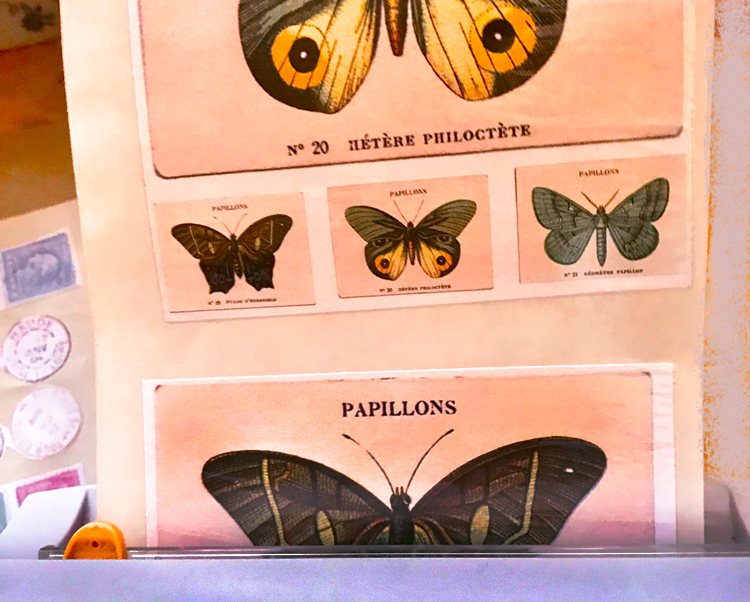
Batch Method – I similar to batch my stickers because it saves on sticker material. But you need to do the procedure because it is a lilliputian tricky to leave just plenty infinite between the images. Once you curlicue the first image through end rolling as you see the lesser showtime to disappear. That is the perfect time to line upwards the next image as shown beneath.
Here is what it looks similar when completed. As yous tin can see, they are close and not wasting also much adhesive!!
Several Images at a Time – You can place several smaller images in the car next, as seen here with some of the French postage stamp ephemera and stamps. In the left image, carefully trim your images leaving just a bit of paper connected between them. Insert them the same style as a full width image. The cool matter well-nigh the Xyron Sticker Machine cartridges is that they are designed to show y'all which cloth you lot take in the machine. Run across the red arrow in right image below.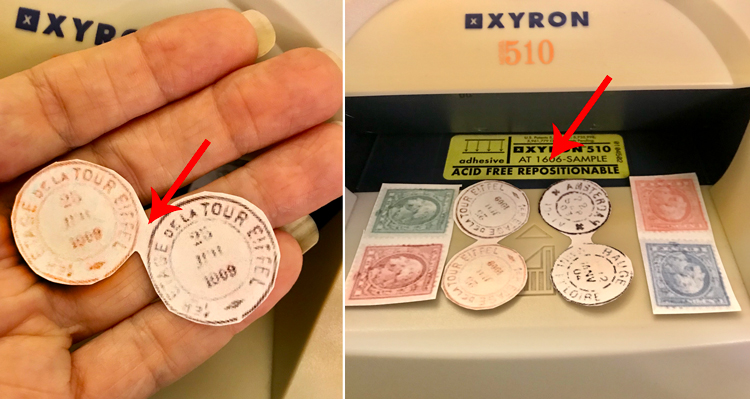
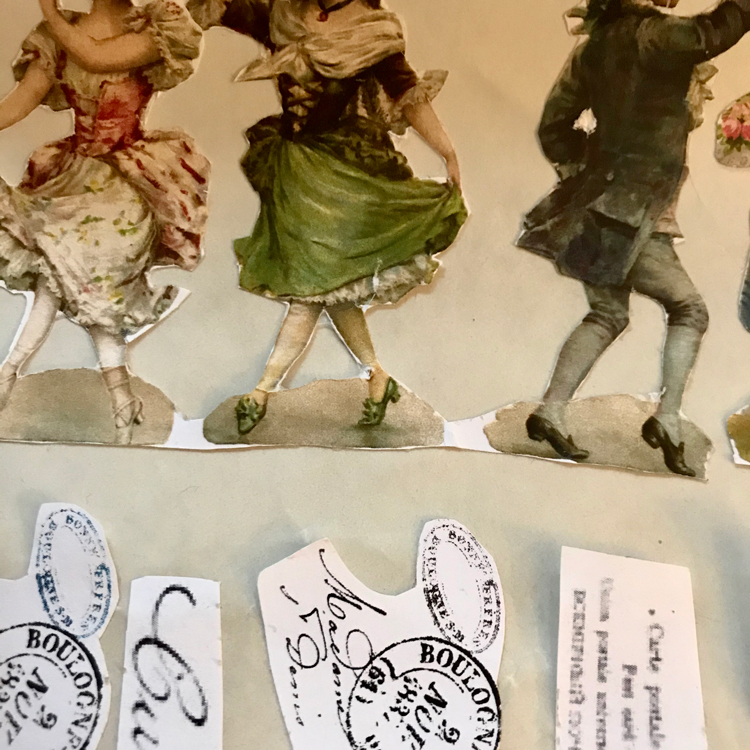
Several Fussy Cut Images at a Time – My best tip is to print the images close to one another on a folio. Then carefully trim your images leaving just a bit of paper connected between them, every bit you lot can see in the dancers below. Deplorable, my fussy cut is not and then bully below…my arthritic hands don't practise so practiced with pair of scissors any more. FYI – Very intricate fuss cuts with tiny open areas may frustrate you as the gum volition stay in these spots. Sometimes information technology tin can stick to a covering like a book page or folded card. One option is to rub inside these areas with a toothpick or dental choice earlier you remove them from the backing canvas. Just be conscientious if you accept something that will cover the sticker.
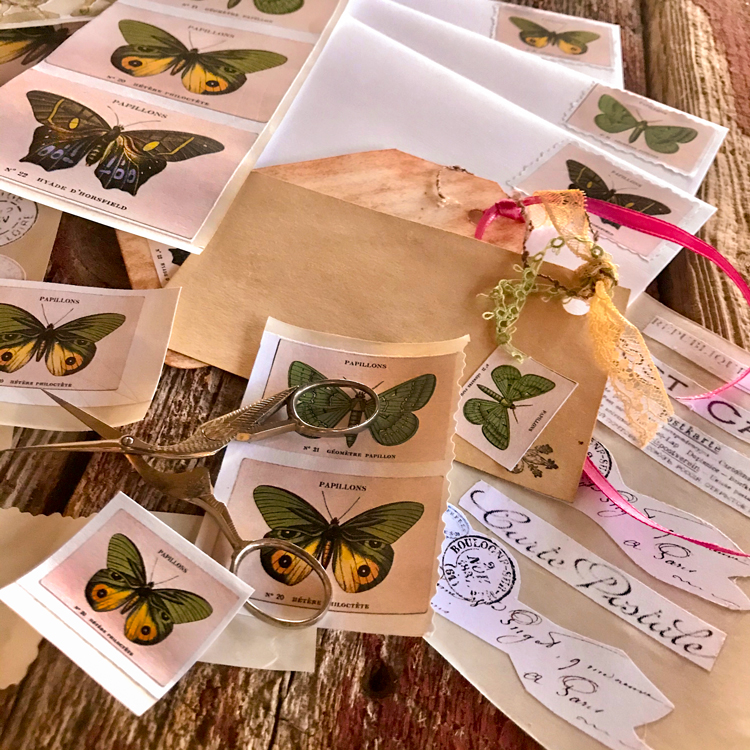
Finishing Your Stickers
Hither are a few ideas to end your stickers. Round the corners with a corner punch. (meridian left) Trim smaller butterfly images with fancy scissors to make them await like postage stamps. (summit right) You can age the edges of your images with your favorite technique. (lesser) I am aging mine with the Shoe Smooth Method that I shared in my How to Age Paper Easily Tutorial HERE!
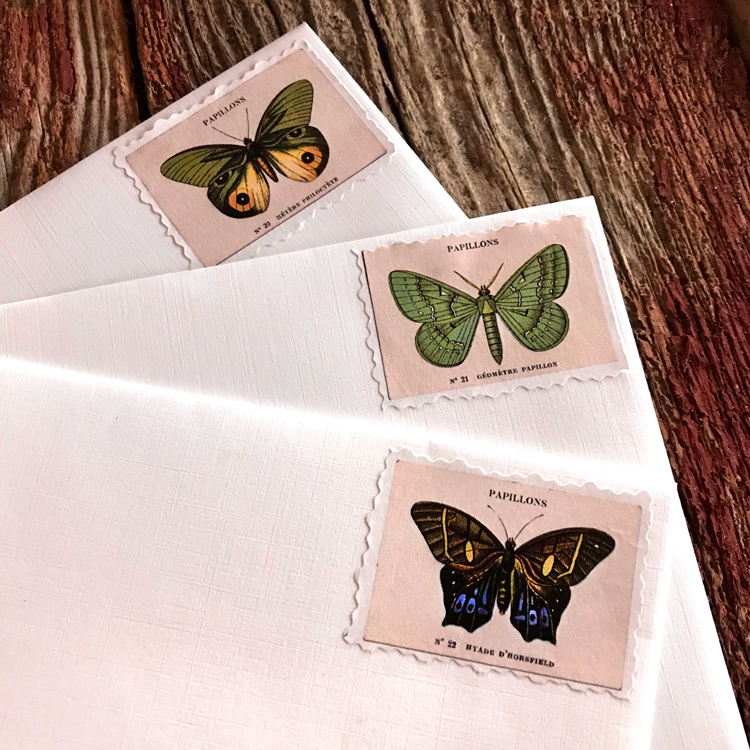
Using Your Papillon Stickers
I have a few ideas (equally always) for ways to employ your stickers. They are great on junk periodical pages or tags. I dearest them used as faux postage stamps or seals on envelopes, just peel sticker and stick! Y'all could make elegant handmade cards or gift tags with these stunning butterfly images. Of grade, you can use them on scrapbook pages too or y'all can make Labels. Please share your ideas with me in the comments!! What did I forget?
I hope that y'all had a boom exploring how to create Stickers With the Xyron Sticker Maker Machine with me!! You might likewise like this Sticker Making Tutorial, without a automobile, HERE.
When I am not playing with new and old Techniques for Mixed Media in my Graphics Fairy sandbox, I also create Photoshop Elements tutorials and craft project videos over on The Graphics Fairy Premium Membership site. You can find even more of my books, art, and whimsical shenanigans on The Bookery

How To Use The Xyron Create A Sticker,
Source: https://thegraphicsfairy.com/xyron-sticker-machine/
Posted by: jacksonsheyesseet.blogspot.com
0 Response to "How To Use The Xyron Create A Sticker"
Post a Comment